The Process
A lot of people still say that infusion is too difficult, too risky and too expensive. If you take the necessary precautions then this is not true. First of all you will need a mould which is fit for infusion. This means that there are absolutely no pin holes in the mould and that it has a flange wider then usual. 30 cm is normal.
After applying the release agent you will spray or brush on a gelcoat of about 0.6 - 0.8 mm.
Infusion resins have a higher styrene contents and are used with a longer gel time. That is why the gelcoat has to be protected by a skin coat which usually consists of a surface veil and 1 or 2 layers of CSM.
After the skin coat has hardened all the composite materials are laid out in the mould. Usually first some CSM (to prevent print through even further) followed by multiaxial fibers, then your core material and again fibers.
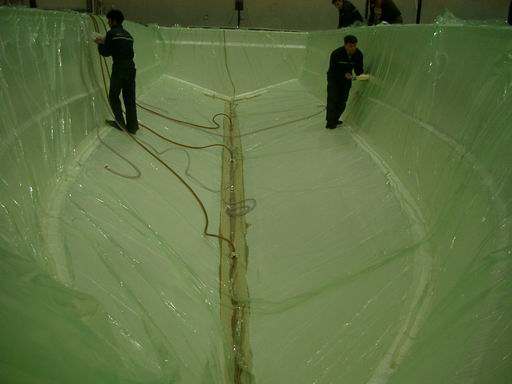
Now comes the most critical part of the infusion: Where to place the resin hoses. On a normal V-bottom hull it is quite simple. One down the center and one at each chine but when it comes to difficult deck structures or multi hulls then a wrongly placed hose may cause big problems. Now make sure that all the fibers and core materials are in place before you place your vacuum membrane.
Seal it to the flange and then apply a low vacuum of approximately -100 mb. This will give you a chance to properly align some core materials which have moved and also very important to make sure that the glass covers all the corners without any bridging. If the membrane bridges a corner it will completely fill with resin (exothermic problems) or even worth it may burst during the infusion when full vacuum is applied.
A careful preparation is everything.
The rest is simple. Draw a full vacuum and check for leaks with a ultrasonic leak detector. Close all the vacuum pipes and watch the vacuum gauge. If there is a rapid drop then there is a leak. Find it. Never ever start an infusion with a "will do" mentality. It will not work.
When you are sure that everything is ok start the resin flow on the injection line furthest away from you vacuum line. Start injecting the secondary line just before the resin reaches it.
After all the glass is wetted out you may slowly decrease the vacuum by 100 - 200 mb. This will cause micro air bubbles which may still be hidden somewhere to be compressed and it will also raise the boiling point of the styrene.
Keep the mold under vacuum for several hours after the resin has gelled.
Production
1.The first infusion we ever did was on a 52' hull. Although we have had a lot of prior experience in manual laminates this project would not have been possible without the assistance of some infusion specialists.
Changeover
2.If you are planning to build composite parts start with infusion right from the beginning. Although this is quite an advantage, we are sure that it would not take very long to convert to it from the old system. Most important is the quality of your moulds. All it takes is a couple of pin holes in your mould or an improperly sealed insert and you will never get a stable vacuum which is absolutely necessary. The result will be a part with dry areas or lakes of resin and a couple of thousand dollars worth of scrap.
Adaptation
3.It will take you about 2 to 3 month to start or convert the actual production to infusion. We found the ideal combination for us to be grooved foam, Vinyl ester resin, Multi axial Glass and Metycore or Soric as a flow media around small radii where the foam will not bend. Testing is one very important necessity. With normal lamination you can stop and go at any time you want. If somebody puts too much catalyst into your polyester you will realize that very soon and you can stop the process. When infusing a 52' Hull in one shot you will have just over 500 Kg of accelerated resin floating around. If you make such a mistake there, you will get some real exothermic problems, again resulting in a lot of scrap and maybe even a badly printed mould. Test every resin mixture right next to the mould (same ambient temperature) before starting the actual infusion.
Workforce
4.We have trained our infusion work force ourselves. You may fiend that for some of the workers it will be rather difficult to adapt to the infusion technology as they will have to start thinking and learning all over again
.
Material
5.As far as the materials are concerned, you will have to change to a resin with a lower viscosity, change the foam if you want to use the channeling system and most probably change your scantling.
Quality
6.a) Unless you use special surface materials as a skin coat, you can almost always tell if a boat has been infused. You will have some print through on the surface. Don't forget that the laminate is pressed against the mould with about 800g /cm². That's about 8 tons/m².
b) Mechanical properties- We all know that the strength of a laminate depends mostly on the amount and the direction of the glass contained in it. Too much resin inside the glass makes it heavy and brittle. Be careful with the scantling. Although you may have the same amount of glass in the laminate, you will end up with a much thinner z-axis. There are minimum thicknesses demanded by Lloyds and Rina.
Investment
7.You will need two good vacuum pumps, a vacuum distribution system, vacuum regulators and an emergency generator powerful enough to drive the pump. The Resins and the foam will be more expensive. The glass should be cheaper because you can use heavier layers. Consumables like vacuum membrane, sealing tape etc. are additional costs if you don't already do vacuum bagging.
The biggest investment will be the rethinking of the Lamination process.
But believe me, it is worthwhile.
Some more tips on infusion
1.The mould must be solid and airtight.
2.Don't even think of starting the infusion without having a stable vacuum. Because 'may do' will not do.
3.Choose Injector houses appropriate to the size of the mould. Too big a diameter can cause a vacuum breakdown.
4.Infusing downwards will cause some rest air to be trapped resulting in dry spots.
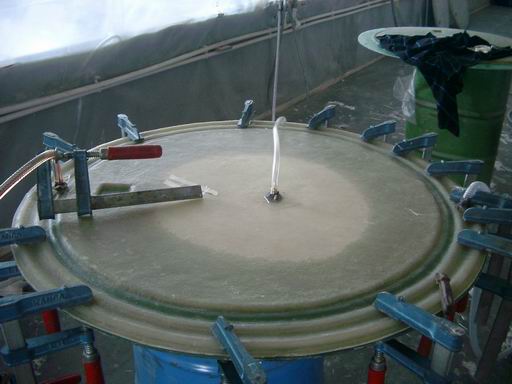
5.If you discover a pinhole just stick a piece of sealing tape over it.
6.All the gaps between the foam will serve as resin channels and will cause unnecessary weight so align them properly.
7.On a 52' boat (depending on the geometry of the part) the resin will have reached the chine after about one hour.
This means that the resin has to be pulled through 2 meters of glass causing it to slow down considerably.
8.That is why we stop the flow from the keel and connect the resin lines to secondary injection lines which have been placed along the chine.
9.It's a good idea to have a stand by generator for the pump.
10.Keep the vacuum up as long as possible. This will prevent pre-releases and a wavy surface when resin contraction starts.